Create Local Area Network in Azure
Problem
When you want to learn how to add computers to LAN (Local Area Network), you must face a problem in which environment you want to apply. Ideally you implement it in on-premise environment such as in your office.
However, it’s almost impossible to test your office infrastructure for learning purpose. Therefore, throughout this tutorial we want to simulate how you can create LAN (Local Area Network) and then add computers to this network. We will simulate it using Azure Virtual Network that will represent the LAN as well as using Azure Virtual Machines to represent the computers.
This knowledge later can be applied to your on-premise environment.
Prerequisites
To follow this tutorial, you need Azure account with active subscription.
Sign in to Azure
You must sign in to Azure portal.
Create Virtual Network
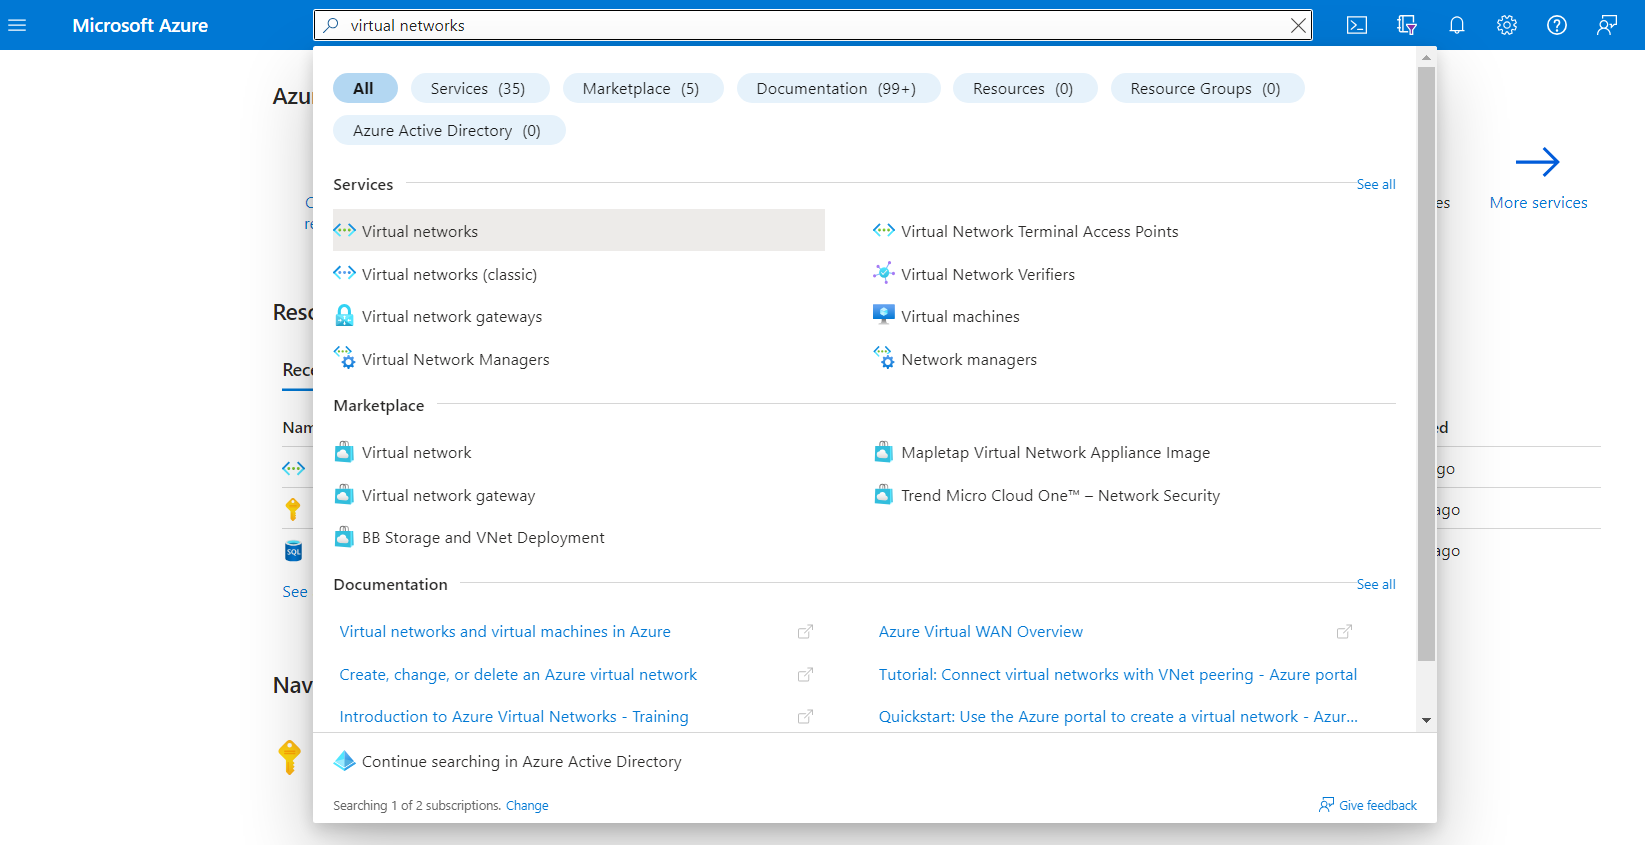
Search for
Virtual networksin Azure portal search bar, then select.Please not to choose
Virtual networks (classic)because there will be an issue when you want to attach virtual machine to the network later.
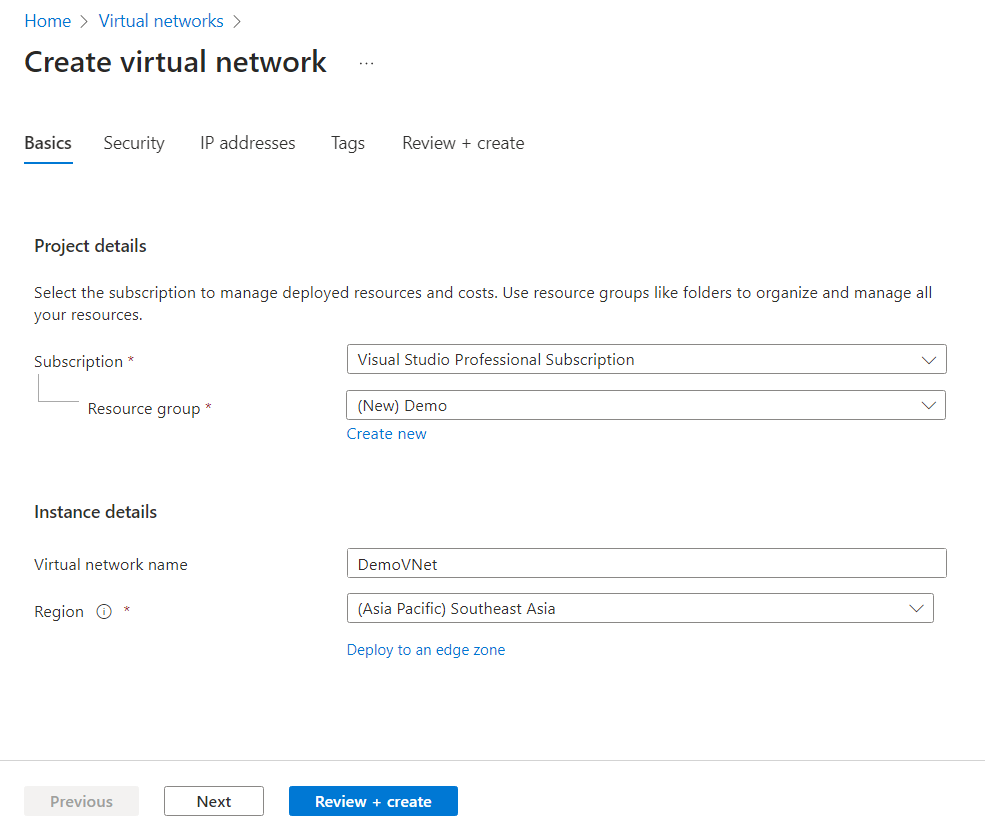
Select
Createthat will navigate you toCreate virtual networkpage.Fill all required details as follows:
- Subscription: Enter your active subscription
- Resource Group: You can use existing resource group or Create a new one if not exists
- Virtual network name: Give the name of your network
- Region: Choose your closest region to reduce latency

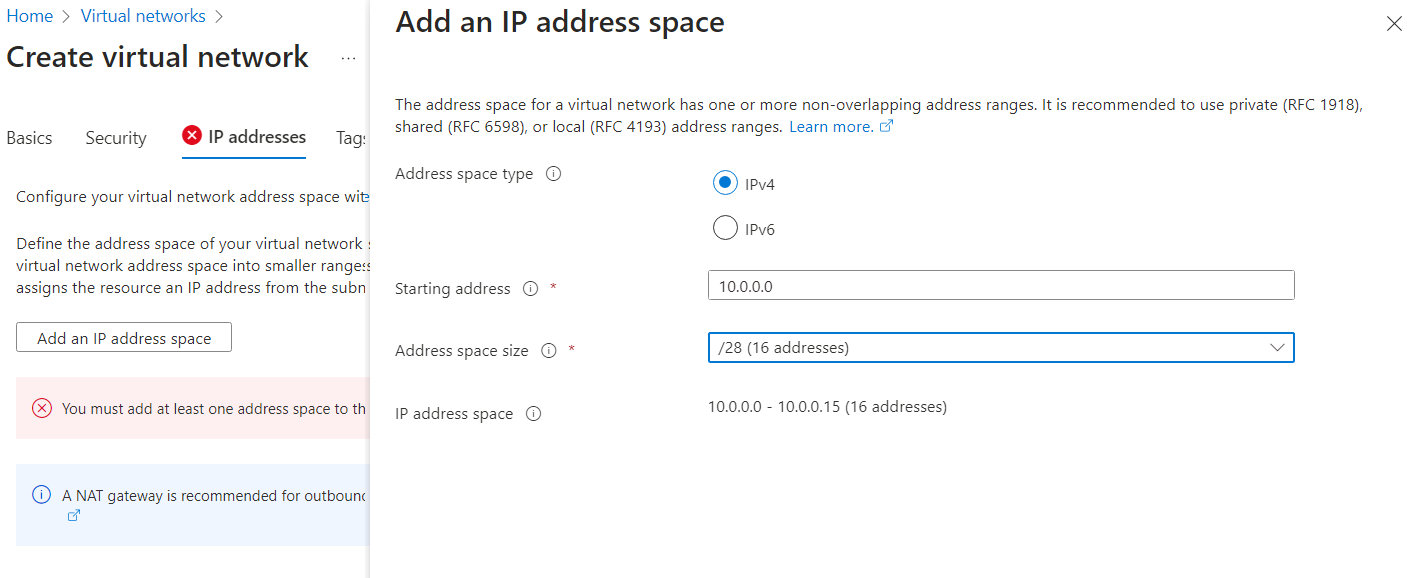
In
IP addressestab, delete existingIP address spacethen create a new one because we want to create a small network consists of only two subnetworks.IP address space is a range of possible IP addresses that can be assigned to the devices in the network. We will use
10.0.0.0/28which means IP addresses will range from10.0.0.0to10.0.0.15.
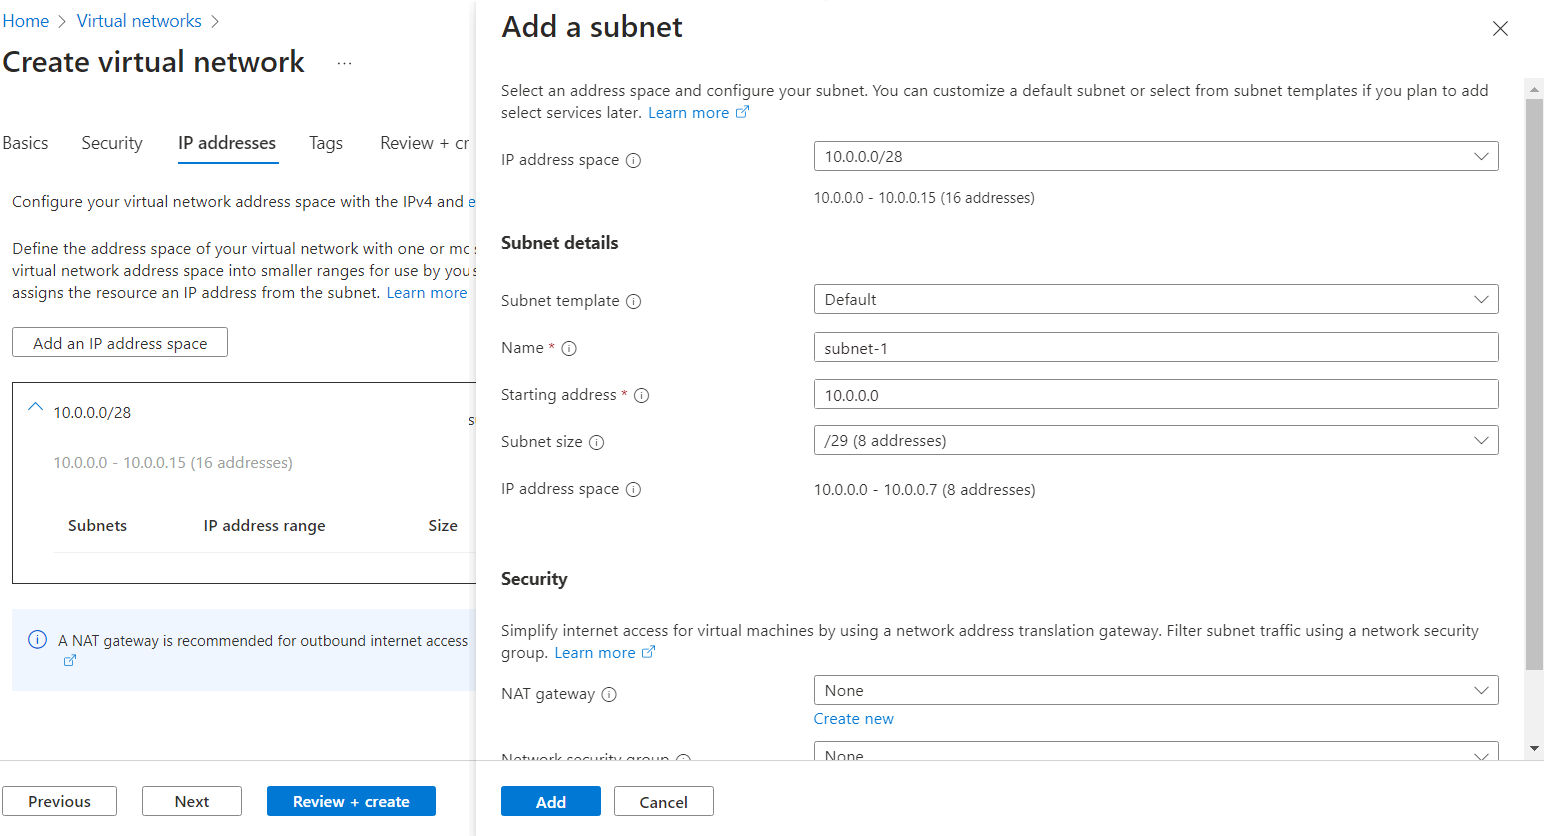
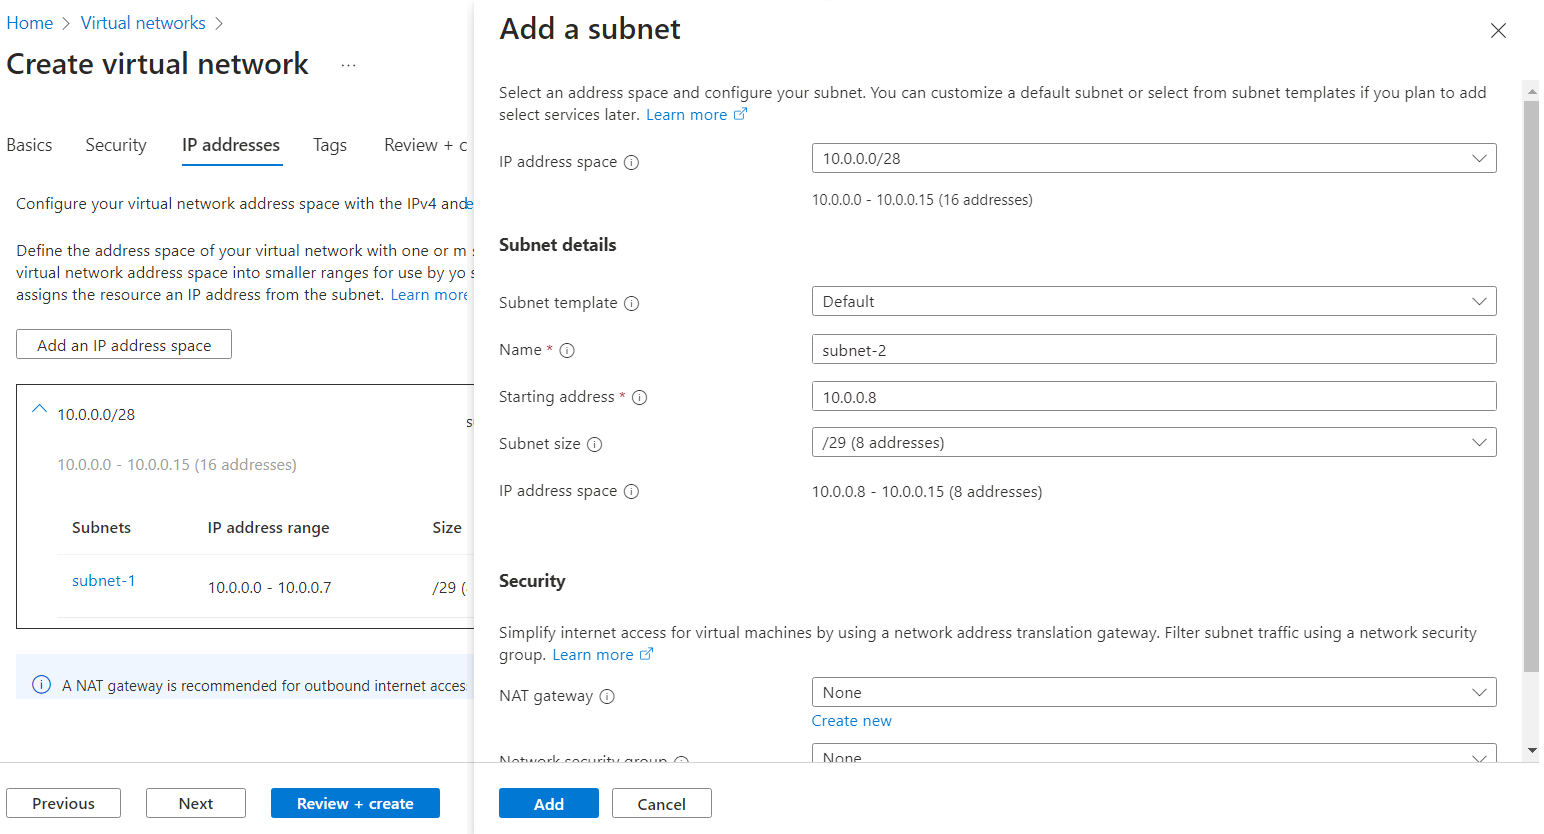
Next, select
Add a subnetto create the first subnetwork where the address spacee is10.0.0.0/29 (10.0.0.0 - 10.0.0.7).
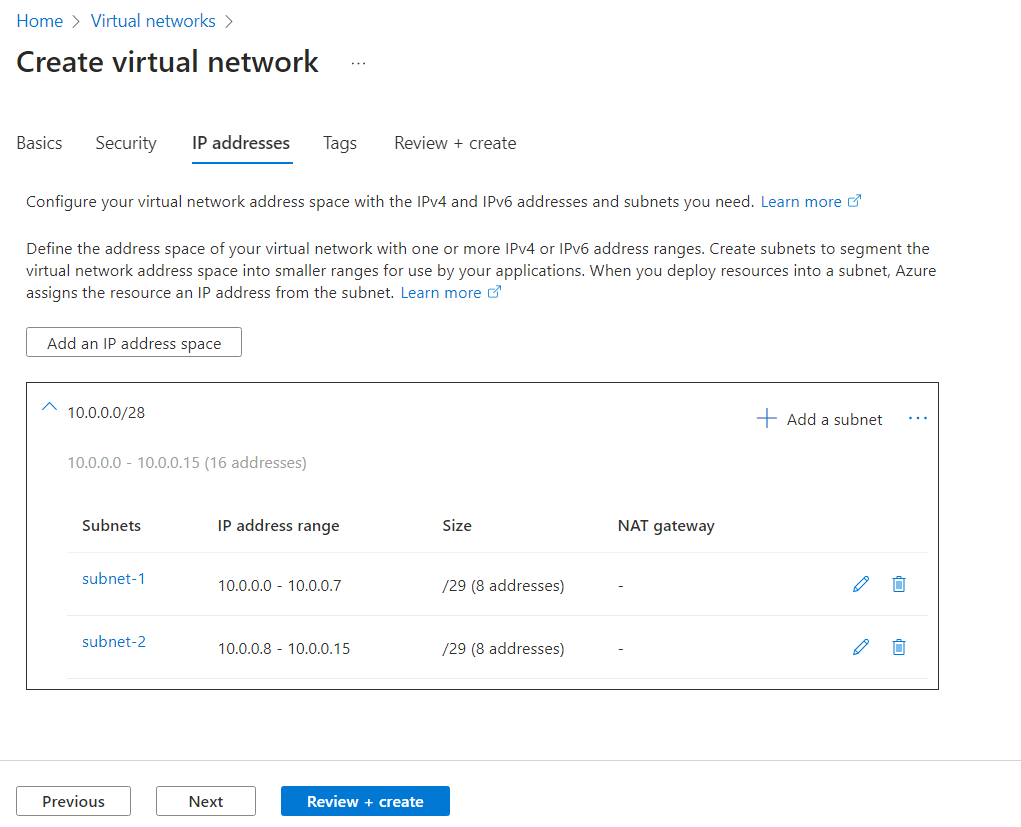
Repeat the same step to create the second subnetwork where the address space is
10.0.0.8/29 (10.0.0.8 - 10.0.0.15).
The final network will look as follows:

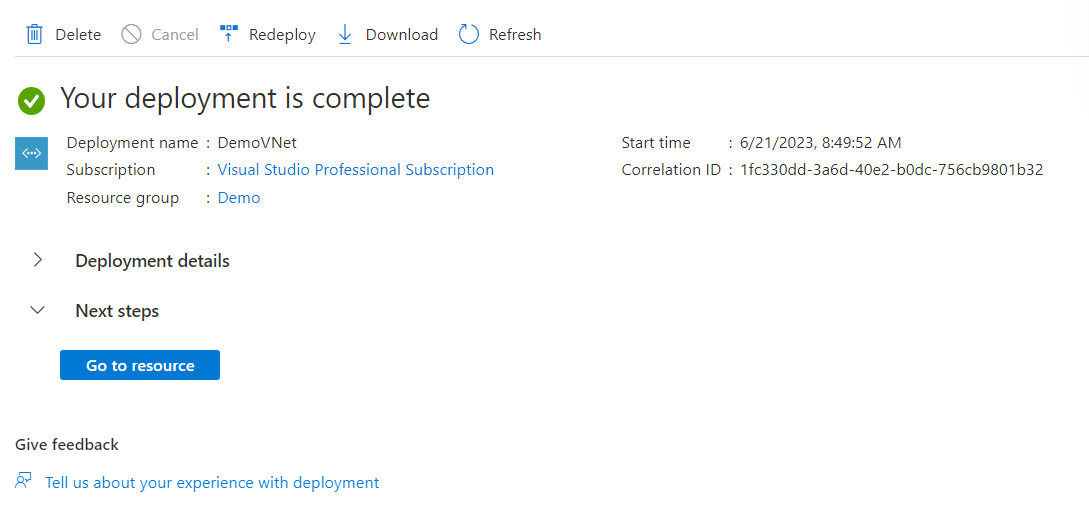
Select
Review + create. If all validations are passed, then selectCreateto create your virtual networkWait until deployment is completed
Create Virtual Machines
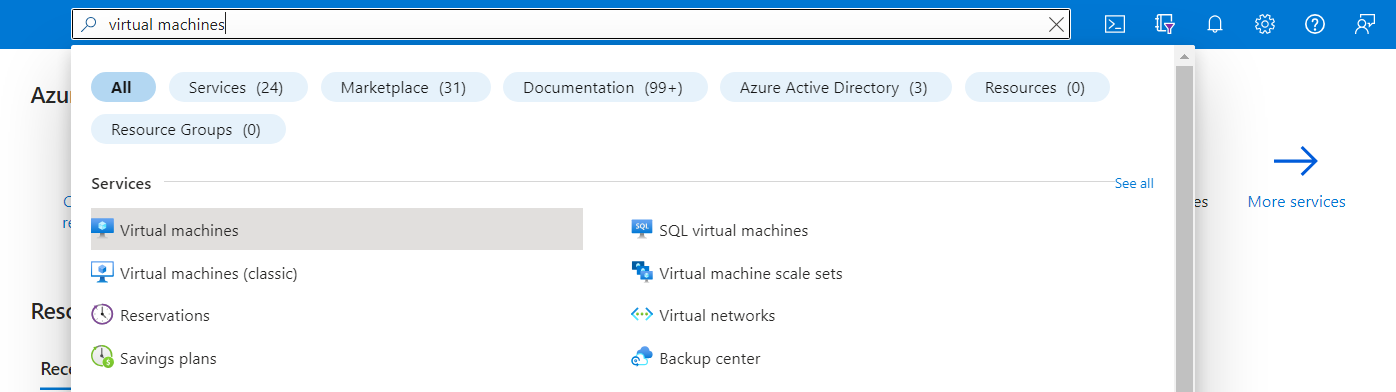
- Search for
Virtual machinesin Azure portal, then select.
Select
Create. In dropdown list, chooseAzure virtual machinethat will navigate you toCreate a virtual machinepage.In this page, there are some tabs you need to fill to align with this tutorial. The rest can be left as it is.
One mandatory requirement is to put our virtual machines in the same subscription and region of virtual networks.
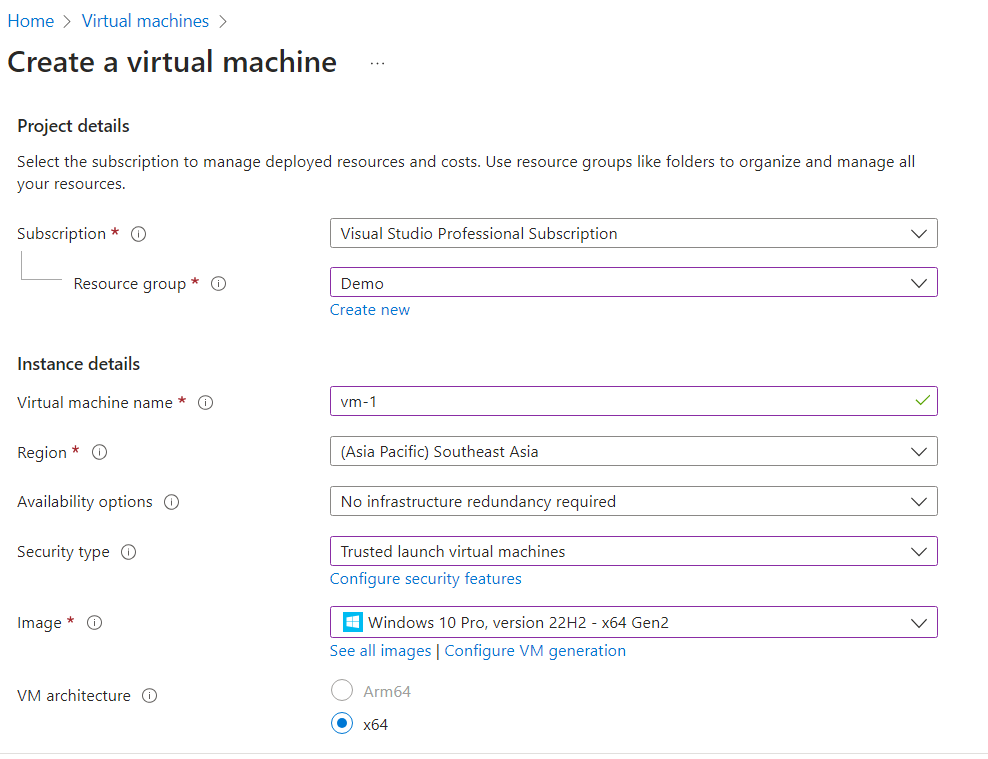
In
Basicstab, fill some required details as follows:- Subscription: It must be the same with our virtual network’s subscription
- Resource Group: Use the same resource group we use in creating virtual network
- Virtual machine name: Give the name for our first virtual machine
- Region: It must be the same with our virtual network’s region
- Image: Use Windows image. In this case, Windows 10 image is enough
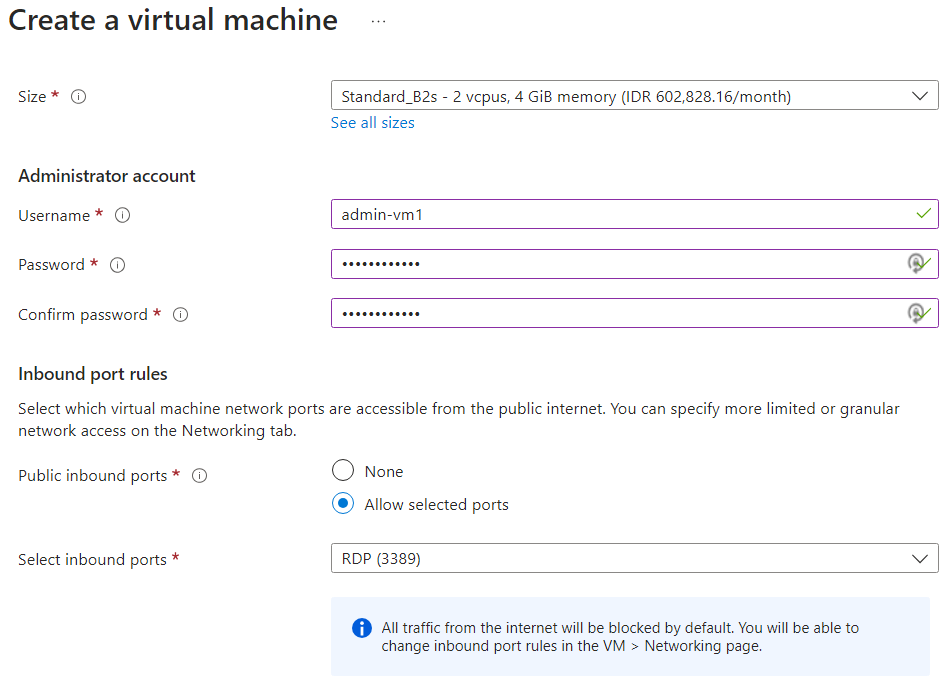
- Size: Use at least 4 GiB memory
- Username, Password, Confirm password: Create account (username and password) for administrator


Do not forget to tick Licensing checkbox at the bottom of
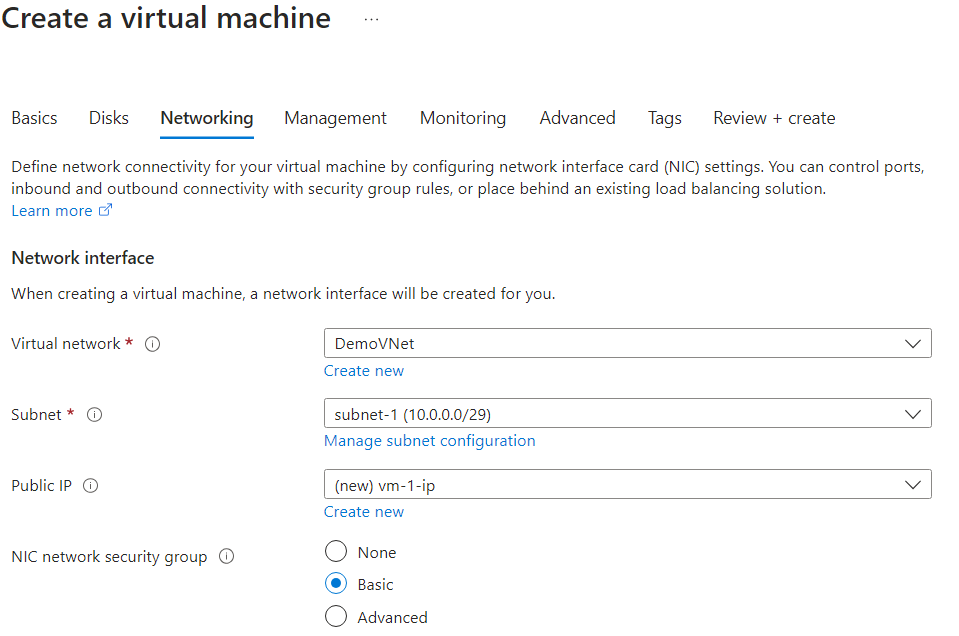
Basicstab.Next, go to
Networkingtab.Choose virtual network we create in previous section and put this virtual machine to the first subnet.
- Select
Review + create. If all validations are passed, then selectCreateto create your first VM. Wait until deployment is completed.

- Repeat the same steps to create the second VM. You could name it as
vm-2, Username asadmin-vm2. Put this VM to the same virtual network but different subnet which issubnet-2. The rest could be left as is.
Automation
To automate deployment of above resources, you could use Azure portal to export the template that can be reused later.
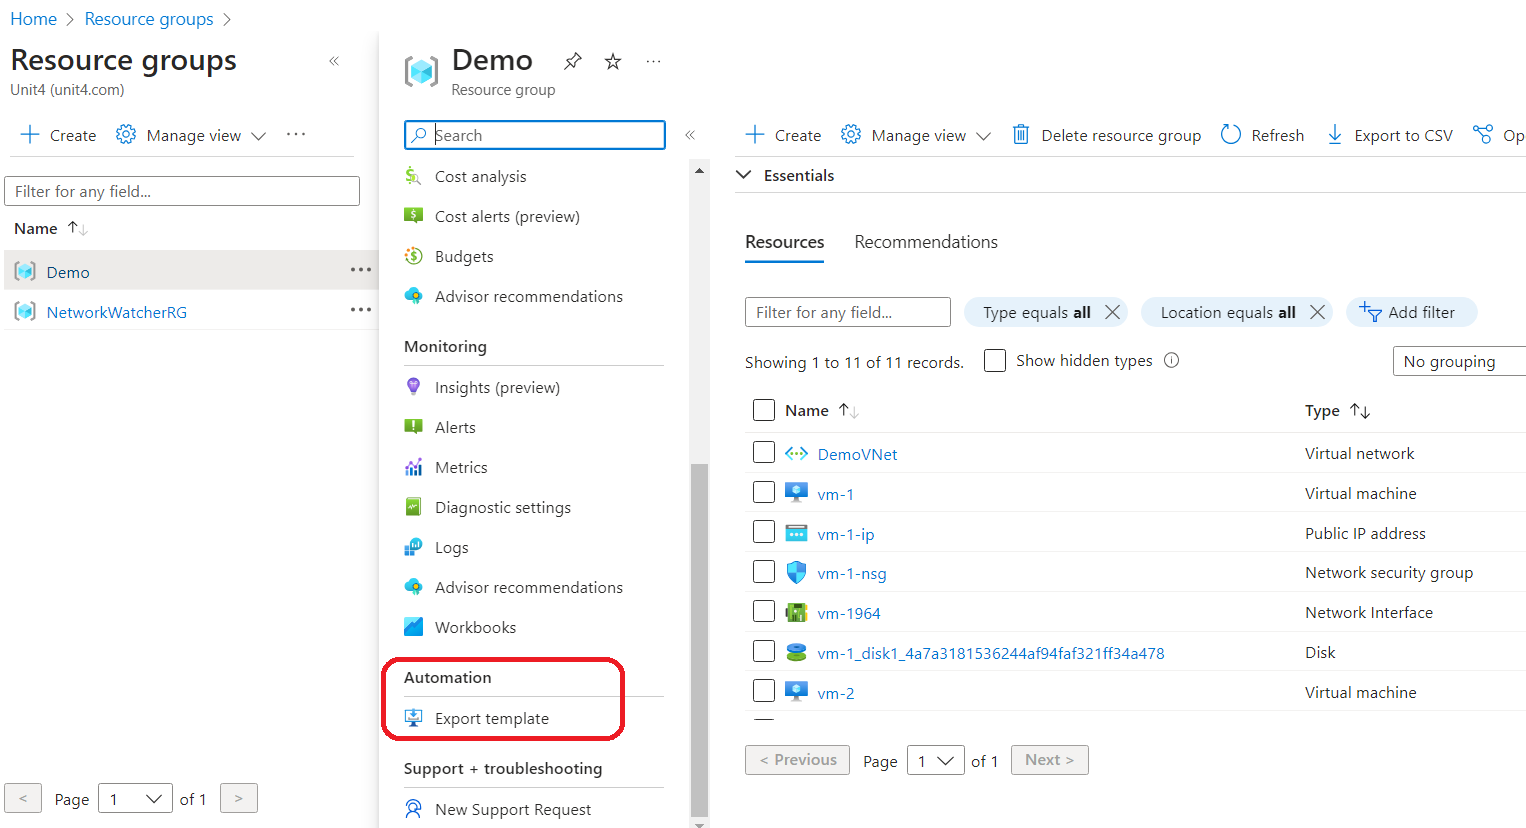
- Select Resource Group used in this tutorial, i.e.,
Demo, then selectExport template
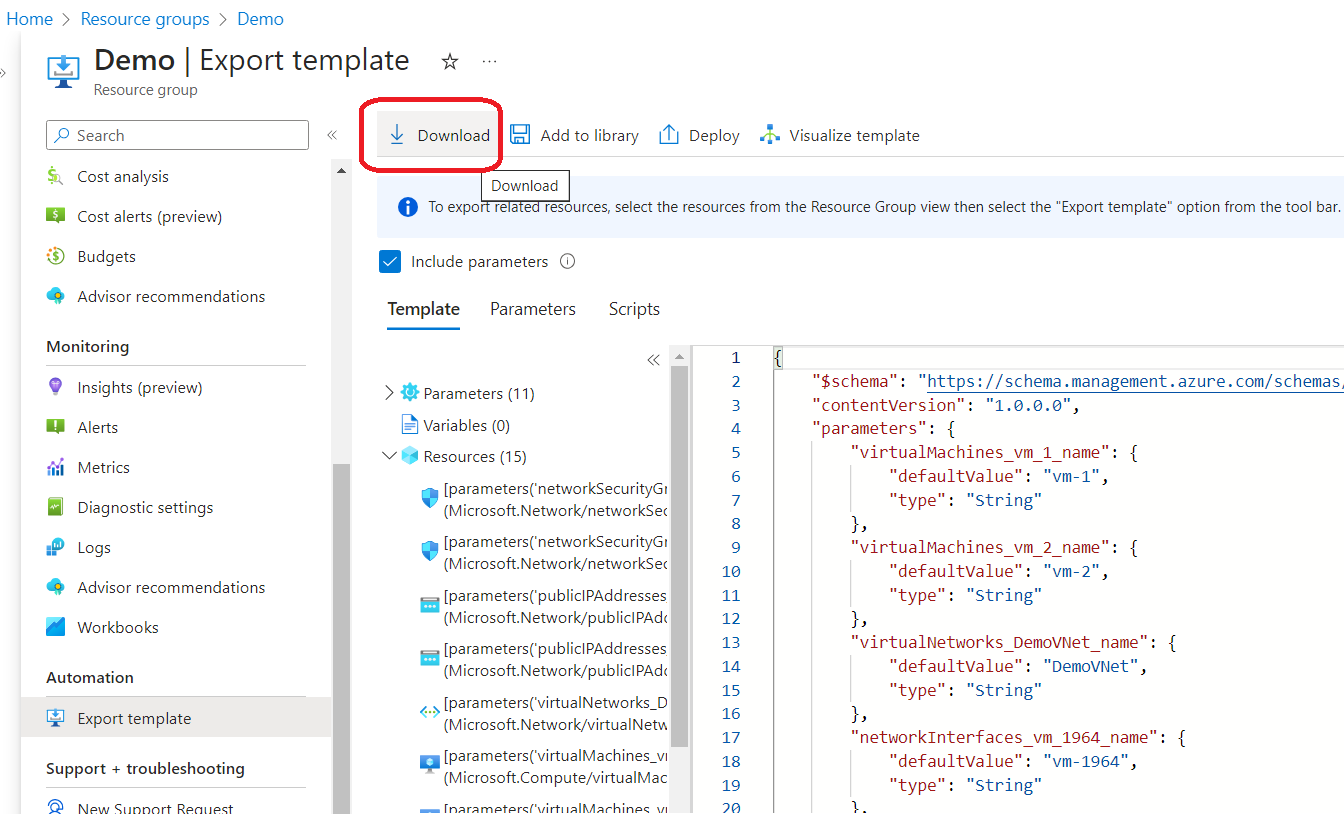
In
Export templatepage, selectDownloadto get the exported template. The template is in JSON format which is also calledARM template, one of many methods to perform automation in Azure.
The template cannot be used as is, so you have to customize it. The following attachments are the original and custom template respectively.
The original template is only a sample while you should apply the custom one.
Conclusion
In this case, we show you how to create virtual network that represent a LAN and add virtual machines that represent computers. The network consists of two subnetworks. The first VM is attached to the first subnet and the second one is attached to the second subnet.
Don’t forget to delete all the resources if you don’t use them anymore because the bill will still be running even though the resources are idle.
To automate resources deployment, you can export ARM template from the portal then customize it because it can’t be used as is.