Hide Excel Rows Using PowerShell
Problem
In this blog post, we will show you how to hide Excel rows using PowerShell.
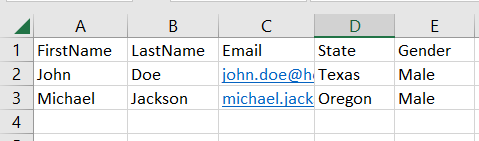
As the context, our original rows will look as follows:
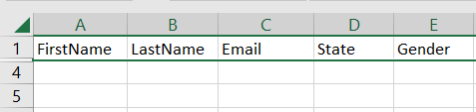
Then, after hiding the second and third rows, our rows will look as follows:
Using Excel Com Object
After creating the object, we will open the Excel file to get workbook object we want to manipulate. Then, we hide the rows by setting Hidden property of the row object to $true.
try {
    # Open excel file
    $excel = New-Object -ComObject Excel.Application
    $workbook = $excel.Workbooks.Open("C:\Scripts\Test.xlsx")

    # Get all the rows within used range in a worksheet
    $rows = $workbook.Worksheets.Item(1).UsedRange.Rows

    # Hide second and third rows
    $rows[2].Hidden = $true
    $rows[3].Hidden = $true

    # Save excel file
    $workbook.Save()
}
finally {
    # Close excel file
    $workbook.Close()

    $excel.Quit()
    [System.Runtime.Interopservices.Marshal]::ReleaseComObject($excel)
}
We enclose the code above with try-finally block because we want to make sure it will release the resource after modifying Excel that is performed at finally block.
Using ImportExcel Module
ImportExcel is an external module that is built based on EPPlus which is a very well-known library to work with Excel spreadsheets in .NET.
Before using ImportExcel module, we have to install it.
Install-Module -Name ImportExcel
And then following previous solution pattern, we have to create Excel object first before hiding the rows by setting Hidden property to $true.
try {
    # Import the module
    Import-Module ImportExcel

    # Open excel file
    $excel = Open-ExcelPackage -Path "C:\Scripts\Test.xlsx"

    # Hide columns on active worksheet and within used range
    $currentWorksheetIndex = $excel.Workbook.View.ActiveTab
    $excel.Workbook.Worksheets[$currentWorksheetIndex + 1].Row(2).Hidden = $true
    $excel.Workbook.Worksheets[$currentWorksheetIndex + 1].Row(3).Hidden = $true
}
finally {
    # Close excel file
    Close-ExcelPackage $excel
}
Similar to previous solution, we enclose the script with try-finally block to avoid memory leak.
Using PSExcel Module
PSExcel is another module based on EPPlus library. You can find all the examples in github repository.
Before using this module, we have to install it.
Install-Module -Name PSExcel
In order to use the object, we must import the module first. Then, we create Excel object by specifying the path of our Excel file. This object will be used to get the rows we want to hide by setting Hidden property of the row object to $true.
try {
    # Import the module
    Import-Module PSExcel

    # Open excel file
    $excel = New-Excel -Path 'C:\Scripts\Test.xlsx'

    # Hide columns on active worksheet and within used range
    $currentWorksheetIndex = $excel.Workbook.View.ActiveTab
    $excel.Workbook.Worksheets[$currentWorksheetIndex + 1].Row(2).Hidden = $true
    $excel.Workbook.Worksheets[$currentWorksheetIndex + 1].Row(3).Hidden = $true

    # Save excel file
    $excel | Save-Excel
}
finally {
    $excel | Close-Excel
}
We also enclose the script with try-finally block to avoid memory leak.
Conclusion
To hide Excel rows using PowerShell, we can use excel module/libraries to manipulate excel.
We can use Excel Com Object which is based on .NET Framework. We can also use PowerShell external modules like PSExcel and ImportExcel. ImportExcel is an excellent module which is based on EPPlus library, a popular C# libary for woking with Excel from .NET.
PSExcel is the alternative of ImportExcel module. PSExcel is also based on EPPlus but this module is no longer maintained as stated in its GitHub repository. If it doesn’t provide functionality that you need, you should contribute to the source code by yourself.