Autofilter Excel Columns using PowerShell
Problem
In this article, I will show you how to autofilter column in Excel using PowerShell.
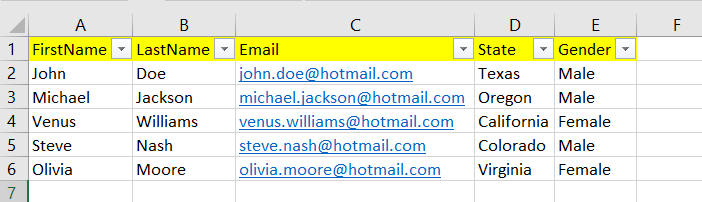
As the context, our columns will originally look as follows:
Using Excel Com Object
If you use Windows PowerShell you can omit the first part of below script which is to import Microsoft.Office.Interop.Excel namespace so that the classes from this namespace can be used.
To autofilter the columns, you can use AutoFilter method from range object. In this case, we use UsedRange which is the range that contains data in the worksheet.
From vba documentation, you can see all parameters from AutoFilter method. This example only uses the first 4 parameters
XlAutoFilterOperator enum is used to associate two criteria which are the second and fourth parameter. This example uses xlOr which is a boolean or operator.
# # If you use Windows PowerShell, you can omit this part of the script
# # which is to search and add the class from Global Assembly Cache (GAC)
$assemblyFile = (get-childitem $env:windir\assembly -Recurse 'Microsoft.Office.Interop.Excel.dll'
    | Select-Object -First 1).FullName
Add-Type -Path $assemblyFile

try {
    # Create excel object
    $excel = New-Object -ComObject Excel.Application
    $workbook = $excel.Workbooks.Open("C:\Scripts\Test.xlsx")

    # Autofilter column
    $sheet = $workbook.ActiveSheet
    $range = $sheet.UsedRange
    $range.AutoFilter(4, '=Oregon', [Microsoft.Office.Interop.Excel.XlAutoFilterOperator]::xlOr, '=Virginia')

    # Save excel file
    $workbook.Save()
}
finally {
    # Close excel file
    $workbook.Close()

    $excel.Quit()
    [System.Runtime.Interopservices.Marshal]::ReleaseComObject($excel)
}
The result will look as follows:
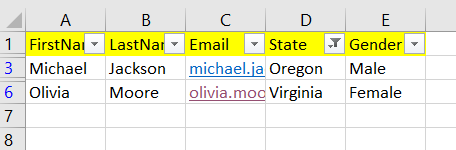
Please notice above example filters State that equals to Oregon or Virginia. If you want to add another conditions like Gender is Female, then you can add another autofilter with different conditions as follows:
# Autofilter column
$sheet = $workbook.ActiveSheet
$range = $sheet.UsedRange
$operator = [Microsoft.Office.Interop.Excel.XlAutoFilterOperator]::xlOr
$range.AutoFilter(4, '=Oregon', $operator, '=Virginia')
$range.AutoFilter(5, '=Female')
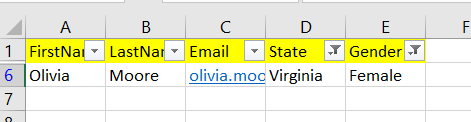
The result will look as follows:
Last but not least, we enclose the code above with try-finally block because if the error happens during processing excel object we want to make sure it will release excel object, which is an unmanaged interop object, to avoid memory leak.
Using EPPlus library
In other PowerShell Excel examples typically we use ImportExcel PowerShell module because the underlying of this module is EPPlus. Thus, if we use that module, we can use all capabilities of EPPlus.
However, when I want to translate EPPlus C# code for AutoFilter to PowerShell, the script doesn’t work as of this writing that uses ImportExcel version 7.8.6.
It is probably a bug, but as the workaround we will write EPPlus C# console application in Visual Studio. Then, the output can be called from command line interfaces like PowerShell or Windows Command Prompt.
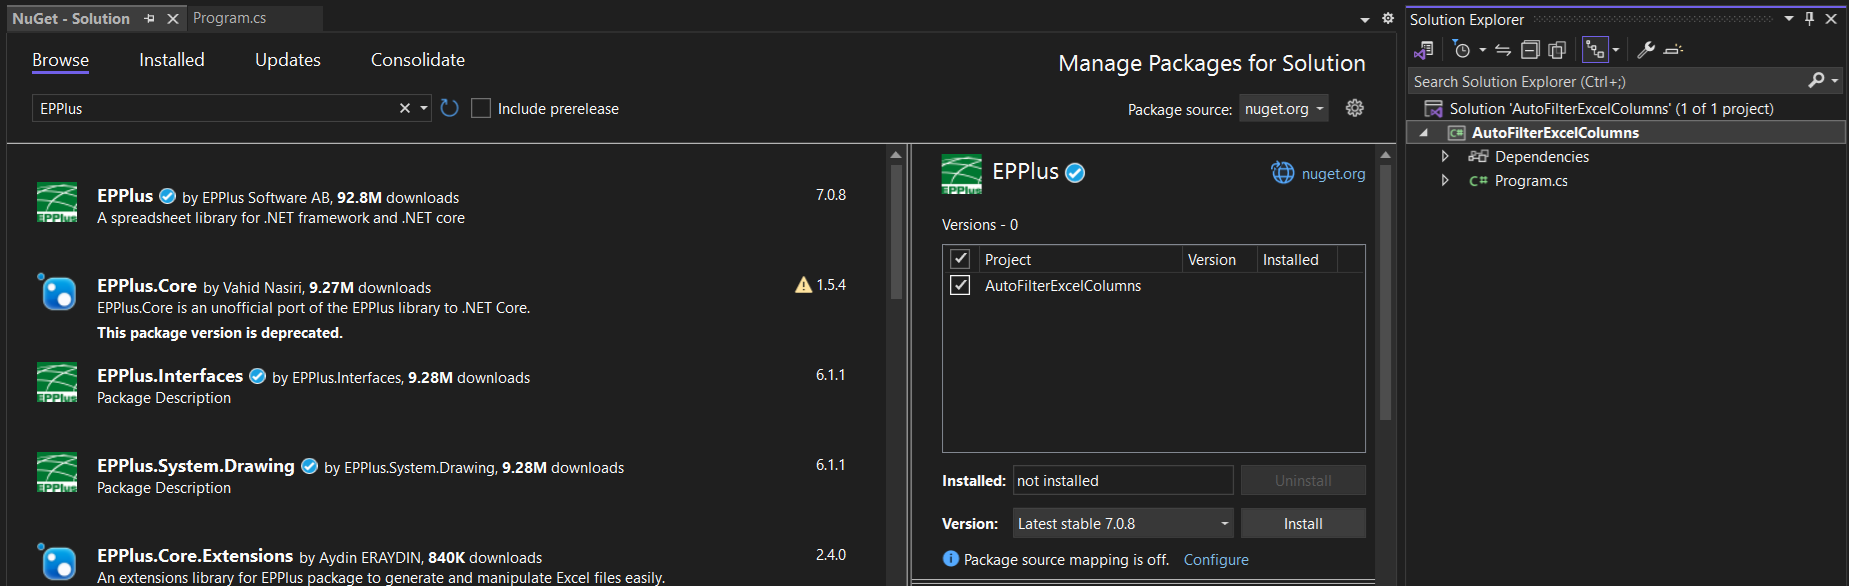
To write C# code, first we need to install EPPlus nuget package.
Then, we apply EPPlus C# code for AutoFilter to the Main method as follows:
using OfficeOpenXml;

namespace AutoFilterExcelColumns
{
    internal class Program
    {
        static void Main(string[] args)
        {
            ExcelPackage.LicenseContext = LicenseContext.NonCommercial;

            using (ExcelPackage package = new ExcelPackage("C:\\Scripts\\Test.xlsx"))
            {
                var activeSheetIndex = package.Workbook.View.ActiveTab;
                var sheet = package.Workbook.Worksheets[activeSheetIndex];

                sheet.Cells[sheet.Dimension.Address].AutoFilter = true;
                var colCompany = sheet.AutoFilter.Columns.AddValueFilterColumn(3);
                colCompany.Filters.Add("Oregon");
                colCompany.Filters.Add("Virginia");
                sheet.AutoFilter.ApplyFilter();

                package.Save();
            }
        }
    }
}
Similar to previous example, if we want to add another condition where Gender is Female, then the code can be modified as follows:
sheet.Cells[sheet.Dimension.Address].AutoFilter = true;
var colCompany = sheet.AutoFilter.Columns.AddValueFilterColumn(3);
colCompany.Filters.Add("Oregon");
colCompany.Filters.Add("Virginia");
sheet.AutoFilter.ApplyFilter();

colCompany = sheet.AutoFilter.Columns.AddValueFilterColumn(4);
colCompany.Filters.Add("Female");
sheet.AutoFilter.ApplyFilter();
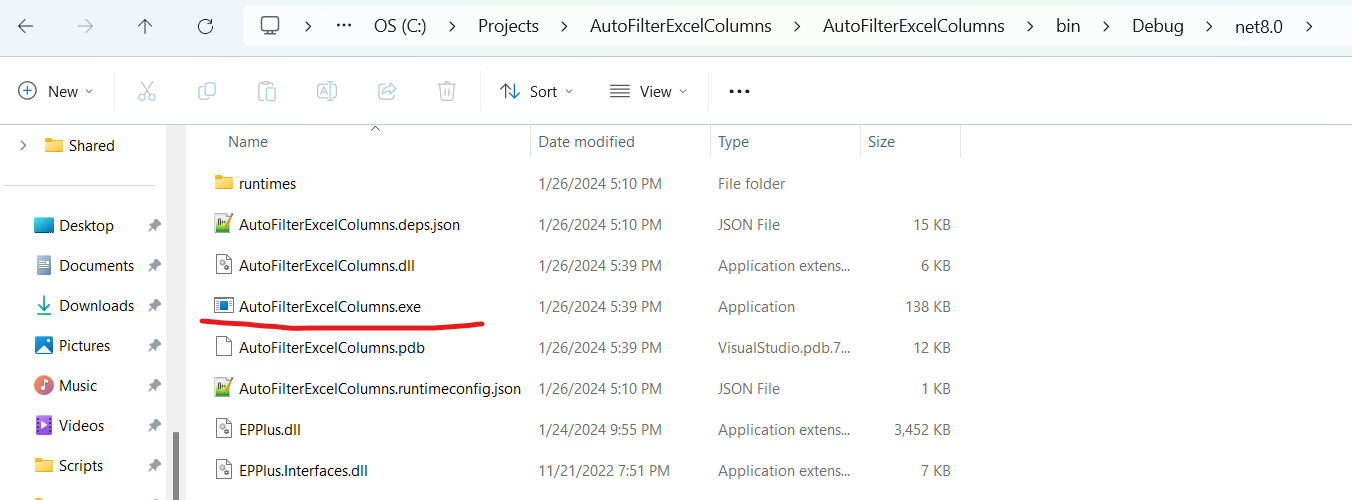
In this case, above C# project use .NET 8.0 version and after compiling the project the executable file will look as follows:
Then, you can execute the executable file (.exe file) from your PowerShell script in order to autofilter the columns.
& 'C:\Projects\AutoFilterExcelColumns\AutoFilterExcelColumns\bin\Debug\net8.0\AutoFilterExcelColumns.exe'

Conclusion
To autofilter Excel columns using PowerShell, you can use Excel Com Object or EPPlus library.
If you use Excel Com Object, which is based on .NET Framework, you can directly write PowerShell script. But, if you use EPPlus library, you should create C# console application project first, then invoke the exe file from your PowerShell script.